Ten of my “workers” images have been featured on the popular photography site SteveHuffPhoto.com!
The direct link to Steve’s site is here.
I’m honoured and would like to thank Mr. Huff for his ongoing support of my work!
—Peter.

Ten of my “workers” images have been featured on the popular photography site SteveHuffPhoto.com!
The direct link to Steve’s site is here.
I’m honoured and would like to thank Mr. Huff for his ongoing support of my work!
—Peter.
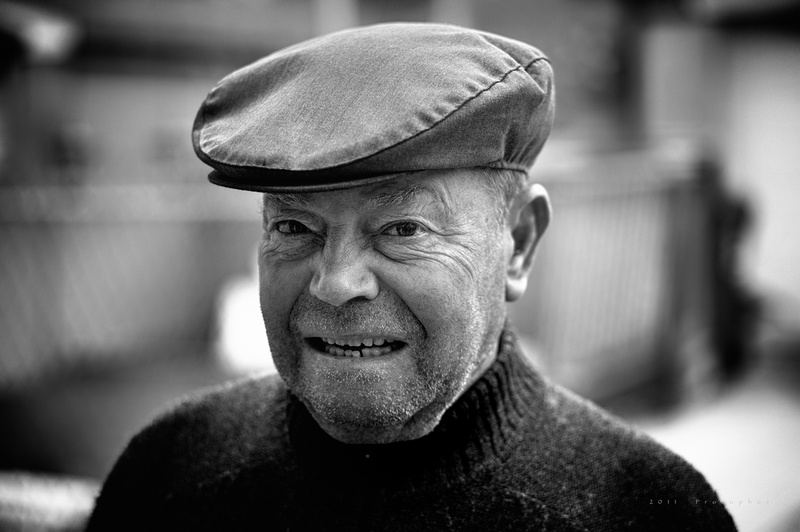
Raymond kindly obliged with a spontaneous street portrait.
(please click on the image to view)

↑Leica M9 and Leica 75mm Summarit @ f/2.5
—

____________________________
The Leica 75mm Summarit f/2.5 is an optically excellent lens.
🙂
That’s really the bottom line, and if that’s all you wanted to know, you can stop reading here.
However, for those of you interested in learning more…
The 75mm Summarit was introduced by Leica in 2007, and — like the rest of the Leica Summarit “budget” line of lenses — was greeted by many Leicaphiles with a great deal of skepticism. Some viewed it as a somewhat mechanically inferior fashioning from Solms, while others questioned whether its optical performance was commensurate with the highly revered Leica brand.
Were the criticisms fair? Was it, in fact, a “dumbed-down” Leica lens?
Well… yes and no… or, maybe.
The answer, like most things in photography, is dependent upon whom you ask, and what their particular needs and wants are.
____________________________
I have this penchant for writing about underdog lenses, like the 75mm Summarit.
It seems strange to label any Leica lens an “underdog”, but there’s a bit of “snobbery” at play when it comes to M mount optics. Most Leica lens connoisseurs (Note: not necessarily Leica photographers) want nothing less than a Summilux f/1.4 (or faster) Leica lens with the latest technology thrown in. For those individuals, any lens that is less than this sort of a fast, state-of-the-art lens, is an optic that has been built around a price point and not perfection.
On some level this is, of course, true. On the other hand, my 75mm Summarit is small, weights 345 grams, balances nicely on my M9, and uses 46mm filters, while my 75mm Summilux is large, weighs 625 grams, tips my M9 forward, and uses 60mm filters. You see, there’s always a price – beyond the monetary kind – to be paid when choosing a lens… there are multiple trade-offs for every choice made.
As a shooter, I know I prefer the portability and handling of my 75mm Summarit, while of course acknowledging my 75mm Summilux is the better choice for dark environments or for achieving maximum subject isolation. The “perfect” lens, therefore, is a relative concept, depending on the task at hand.
____________________________
I’m always careful to represent my lens write-ups as brief user impressions (as opposed to comprehensive reviews) because I want to limit the discussion to issues with which I’ve had direct experience, or which interest me. To do a proper review would require engaging in all sorts of tedious tests in which I have no interest.
In light of the above, you should be aware that I almost always shoot lenses at their widest aperture and normally photograph people, so bokeh, performance at close-to-mid distances, and central sharpness are important considerations. On the other hand, I’m rarely concerned with lens performance at infinity or in the corners because I don’t often shoot landscapes.
The rest of this write-up, then, will concentrate on how the 75mm Summarit behaves within these very strict parameters. In this way, I hope to reliably convey why I appreciate this lens.
____________________________
This is a bit of a diversion, but it’s an important one.
The 75mm focal length is an odd one for M rangefinders, because proper viewfinder frame lines for it don’t exist. In fact, when you connect a 75mm lens to the camera, you get a partial connect-the-lines outline of a small box that sits inside the larger and much more visible 50mm frame line box. In the image below, I’ve schematically overlaid the 50mm and 75mm “boxes” onto a sample image, to illustrate the point:
(please click on the image to view)

↑Schematic of viewfinder: 75mm (red) + 50mm (black) frame lines.
In this image, the lines which I’ve arbitrarily coloured red represent the 75mm “box” and the black lines correspond to the 50mm “box”. Both of these “boxes” are seen in the viewfinder when you connect either a 50mm or 75mm lens to a Leica rangefinder. The idea is to compose your photo with the correct frame lines and then press the shutter.
You can therefore see how easily it would be to unintentionally crop while photographing with a 75mm lens because your eye is more readily drawn to the outer, more solid 50mm box, and not the inner, more fragmented 75mm box. For example, if I mounted a 75mm lens onto my M9 and took the shot above, as framed, I would end up cutting off the heads and feet of several people in the scene.
For many Leica rangefinder photographers then, the 75mm focal length is entirely avoided, in favour of either 50mm or 90mm (which brings up its own set of frame lines).
Why, then, am I interested in shooting with a 75mm lens?
I like to shoot portraits. I sometimes find the 50mm focal length to be too short for individual head-and-shoulder shots, and the 90mm focal length to be a little long – even though longer lenses tend to flatter faces. When shooting at 90mm, I need to be relatively far from my subjects to get the composition I desire, and this inhibits me from closely interacting with them (close interaction, I believe, is vital for coaxing a person’s personality into an image). The 75mm focal length, then, serves as my “just right” perspective for shooting intimate portraits.
Also, a pairing of the 35/75mm focal lengths makes for a diminutive and very versatile lens travel kit, so a light-weight 75mm lens like the Summarit is a welcomed member of any travel lens arsenal.
____________________________
I find 100% crop image comparisons to have little relevance to good photography. Ultimately, I know that inspired shooting has less to do with lens sharpness, bokeh, or any of the other lens characteristics people obsess over (and yes, I’ve been guilty of obsessing over these too), and more to do with harnessing good light, capturing a special event, or evoking an emotional response.
However, I realize that lens comparisons are necessary when entering into an earnest discussion about, well… lenses. To that end, I’ve included a small sample of 100% crops in this write-up.
Seeing as a 75mm lens should ideally be measured up against another 75mm lens, I have chosen to compare my 75mm Summarit (f/2.5) with my 75mm Summilux (f/1.4). I don’t currently have access to the 75mm Summicron (f/2), so it’s not included here.
Since this is a big-budget website, I’ve spared no expense in setting up this demonstration. I’ve hired a professional model, Rapunzel, and draped her over an exotic Subaru. 😉
Not very politically correct, I’m afraid. All joking aside, here are the images…
_
DISCLAIMER: This is not intended to be an exhaustive analysis of these two lenses. Not even close! I shot this small comparison for my own purposes and I’m simply posting the results for your viewing pleasure and/or interest. You may choose to draw you own conclusions, but please don’t write to me that “this is not a valid comparison, because…“.
I know it’s not a valid comparison.
_
In the images below, the 75mm Summarit and 75mm Summilux were shot on an M9 @ f/2.5 and f/2.4, respectively. I also shot the 75mm Summilux wide open @ f/1.4. No sharpening or post-processing was performed, other than converting the original file from DNG to JPG . The M9 was shot fully in manual mode. The focus was on my “model”, Rapunzel, and focus bracketing was employed to ensure that the sharpest image from each lens was used for the comparison.
So here is the overall scene:
(please click on the image to view)

↑Leica M9 and Leica 75mm Summarit @ f/2.5.
_
Now, here are are the 100% centre crops:
(please click on the image to view LARGE)
 crop.")
↑75mm Summarit @ f/2.5 + Summilux @ f/2.4 and f/1.4 (centre 100% crop, no sharpening)
When you click on the panel above, the one thing that strikes you immediately is that both lenses are extremely sharp (remember, these are unsharpened 100% crops — astounding, when you think about it). And even @ f/1.4, the 75mm Summilux is almost maximally sharp, which is incredible, when you consider the advanced age of this optic.
The second thing to notice, which is more difficult to see and perhaps not visible at all unless you’re viewing these on a large screen, is that the 75mm Summarit @ f/2.5 is a tiny bit sharper than the 75mm Summilux @ f/2.4 (and @ f/1.4). It’s a subtle but real finding.
The third, and perhaps most subtle finding, is that the background immediately behind the model’s head — which in actuality represents the beginning of the bokeh — appears sharper (or some would say harsher) in the 75mm Summarit @ f/2.5 vs. the 75mm Summilux @ f/2.4. Of course, the smoothest background is seen with the 75mm Summilux @ f/1.4.
Does this observation about bokeh hold up, the further back we go?
Let’s look at a crop from the candle holder, on the right side of the frame.
Here are the right 100% crops:
(please click on the image to view LARGE)
 crop.")
↑75mm Summarit @ f/2.5 + Summilux @ f/2.4 and f/1.4 (right 100% crop, no sharpening)
Once more, the bokeh of the Summarit @ f/2.5 appears slightly sharper (harsher) than the Summilux @ f/2.4. I’m splitting hairs here, but that’s what one does when viewing 100% crops.
Finally, let’s go back further and look at the bokeh where the spot of light is, near the top of the frame.
Here are the top 100% crops:
(please click on the image to view LARGE)
 crop.")
↑75mm Summarit @ f/2.5 + Summilux @ f/2.4 and f/1.4 (top 100% crop, no sharpening)
Yet again, the 75mm Summarit @ f/2.5 renders its bokeh in a slightly sharper/harsher fashion, as compared to the 75mm Summilux @ f/2.4.
What’s interesting in this shot, however, is that the shape of the out-of-focus light source is more pleasingly round in the 75mm Summarit @ f/2.5 as compared to the 10-sided shape (decagon) we get with the 75mm Summilux @ f/2.4. In contrast, the 75mm Summilux @ f/1.4 has a pleasing oval shape (and you will also note that the frame is a little darker because this lens vignettes @ f/1.4).
____________________________
So, there you have it.
Does the above matter for actual photography? No, not at all.
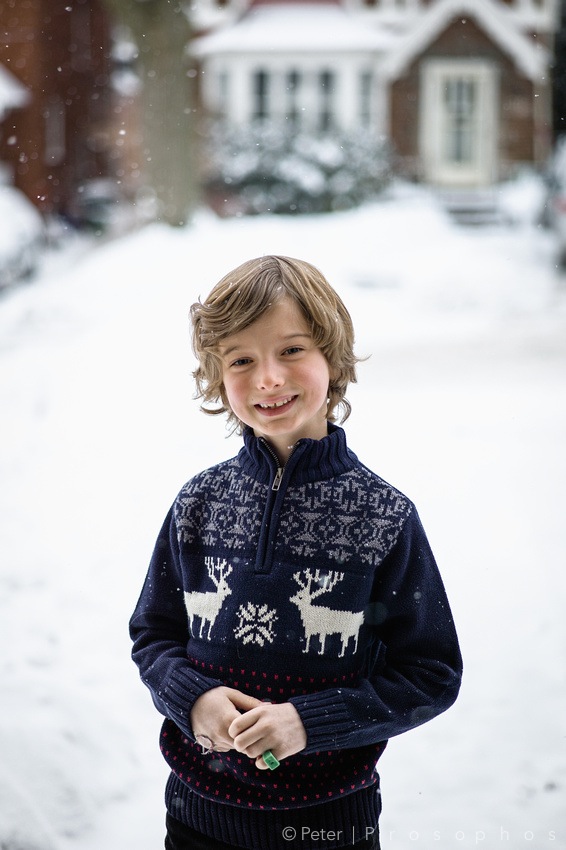
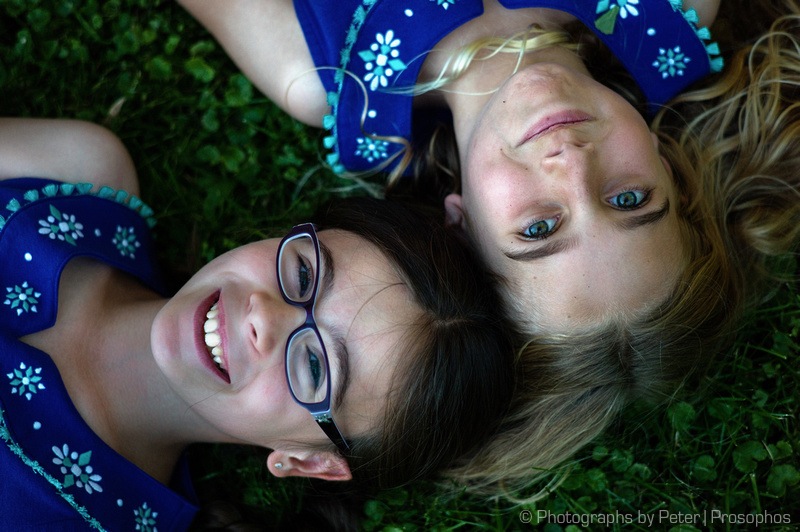
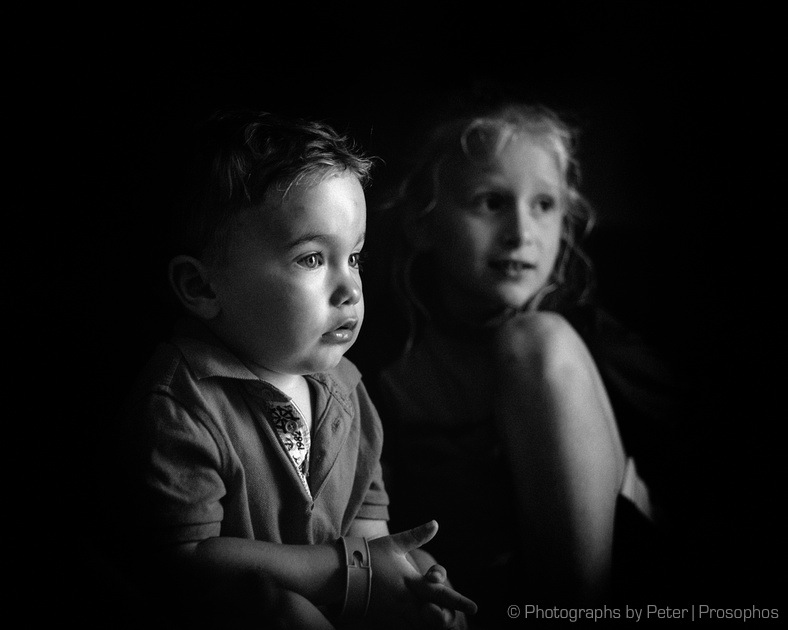
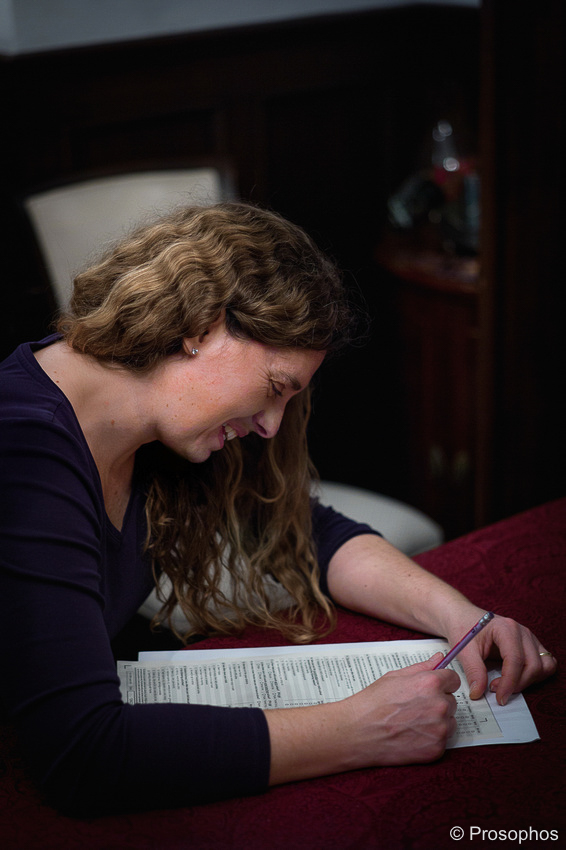
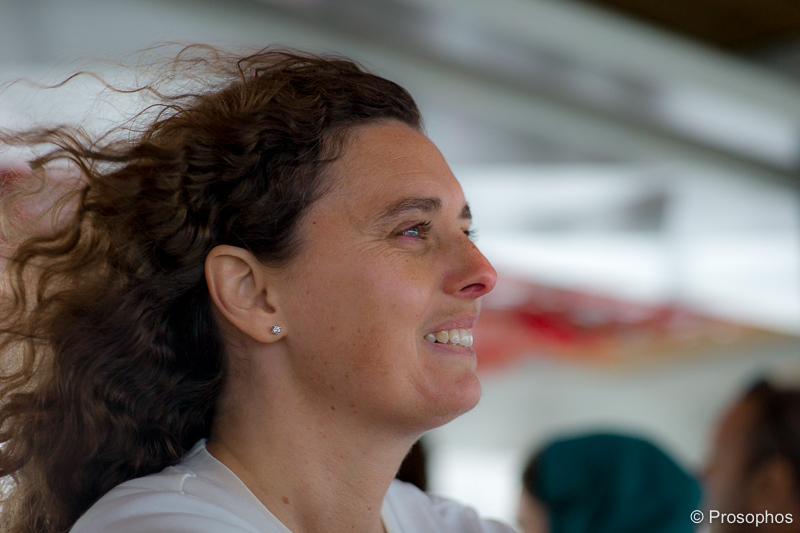
For example, I’ve found the 75mm Summarit to be an excellent portrait lens:
(please click on the images to view)

↑Leica M9 and Leica 75mm Summarit @ f/2.5.

↑Leica M9 and Leica 75mm Summarit @ f/2.5.

↑Leica M9 and Leica 75mm Summarit @ f/2.5.
↑Leica M9 and Leica 75mm Summarit @ f/2.5.
↑Leica M9 and Leica 75mm Summarit @ f/2.5.
↑Leica M9 and Leica 75mm Summarit @ f/2.5.
Occasionally, when the background is distracting, the bokeh can seem less than perfect (see the fence below), but this would be true of any lens at f/2.5 (meaning, you’d have to use an f/1.4 or wider aperture lens to overcome this sort of a background — and even then it would be a challenge):
(please click on the image to view)
↑Leica M9 and Leica 75mm Summarit @ f/2.5.
If there’s any criticism I have for the 75mm Summarit is that it is perhaps too sharp for certain kinds of portraits, where you don’t necessarily wish to see every wrinkle or skin blemish!
____________________________
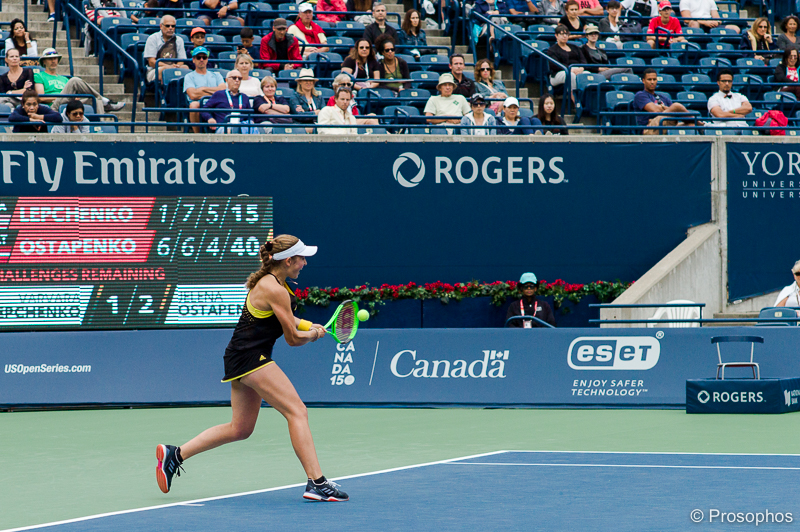
One of the most useful things about this lens is its short focus throw. What this means, in practical terms, is that I can focus between the extremes of near and far with a short turn of the focus ring. The “price” you pay for this is a loss of focus precision, but this is less of a problem when focusing a 75mm lens @ f/2.5 (the maximum aperture of the 75mm Summarit) vs. focusing @ f/1.4 (the maximum aperture of the 75mm Summilux — which, quite appropriately, has a long focus throw).
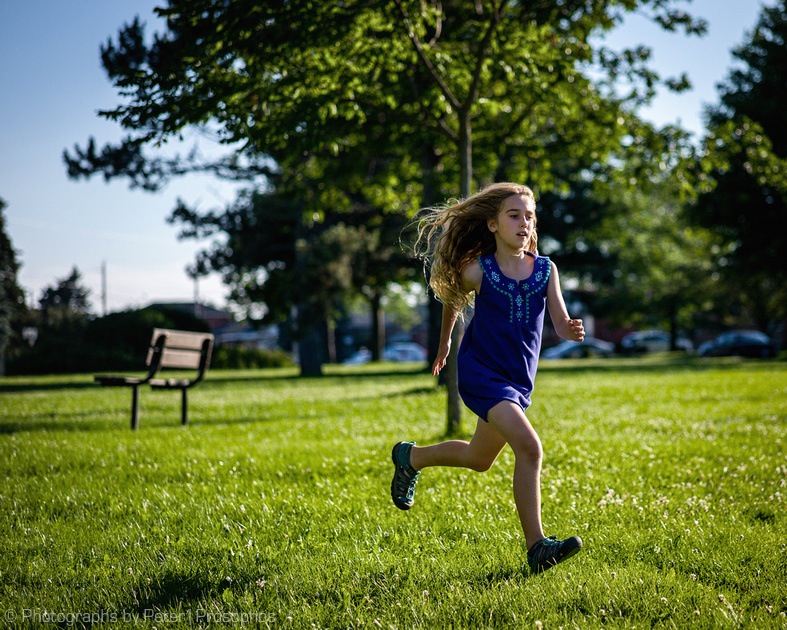
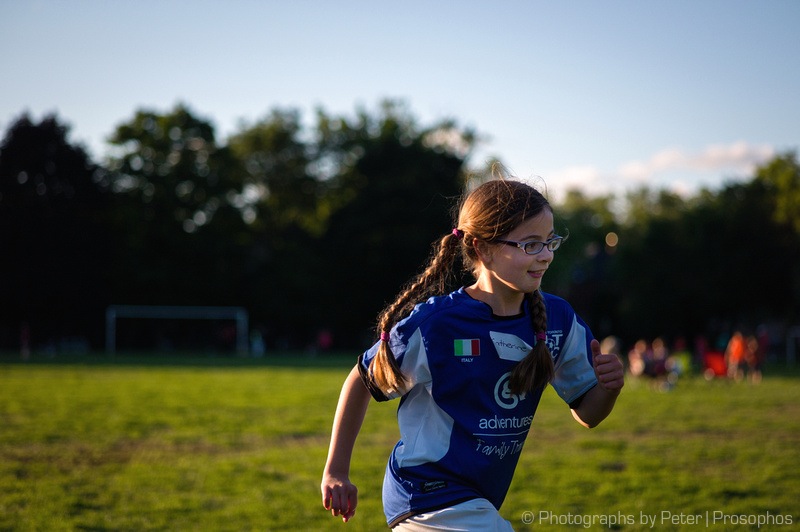
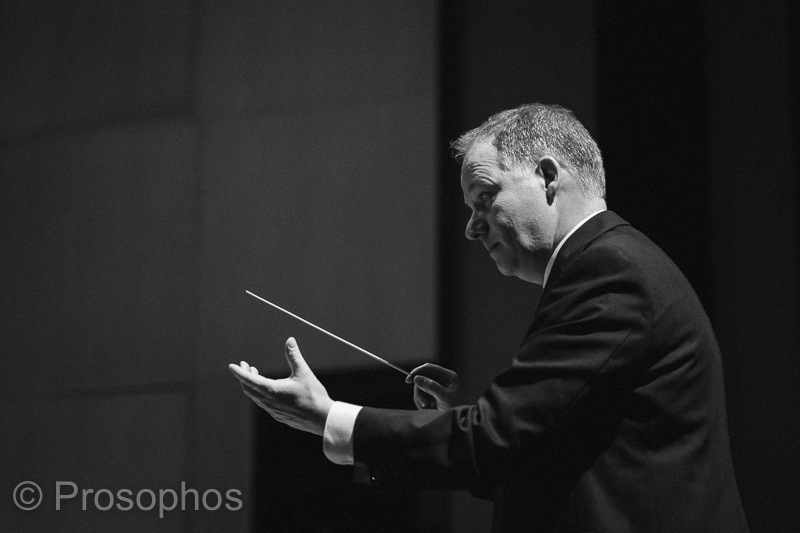
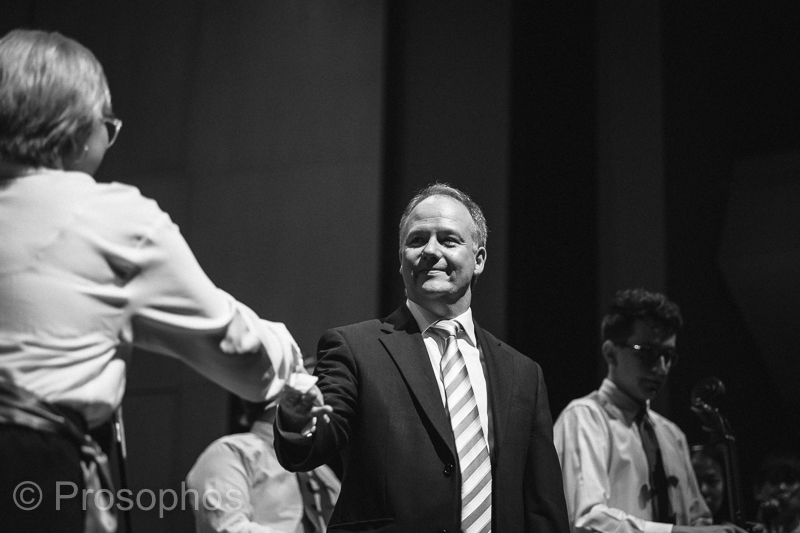
The 75mm Summarit’s short focus throw makes it possible to photograph action:
(please click on the images to view)

↑Leica M9 and Leica 75mm Summarit @ f/2.5.
↑Leica M9 and Leica 75mm Summarit @ f/2.5.
↑Leica M9 and Leica 75mm Summarit @ f/2.5.

↑Leica M9 and Leica 75mm Summarit @ f/2.5.
↑Leica M9 and Leica 75mm Summarit @ f/2.5.
↑Leica M9 and Leica 75mm Summarit @ f/2.5.

↑Leica M9 and Leica 75mm Summarit @ f/2.5.

↑Leica M9 and Leica 75mm Summarit @ f/2.5.

↑Leica M9 and Leica 75mm Summarit @ f/2.5.

↑Leica M9 and Leica 75mm Summarit @ f/2.5.

↑Leica M9 and Leica 75mm Summarit @ f/2.5.

↑Leica M9 and Leica 75mm Summarit @ f/2.5.
As for weight and size, I’ve already mentioned that this lens is very portable. It doesn’t come with a built-in hood, however, which is a shame.
Another strike against the 75 Summarit is its minimum focus limit of 0.9 m, which is short of the 0.75 m limit of the 75mm Summilux (or the 0.7 m limit of the 75mm Summicron). A difference of 15 or 20 cm may not seem like much, but it feels substantial when trying to get close to your subject. As I mentioned earlier, the ability to get close when shooting portraits is of vital importance to me, so this is probably the biggest issue I have against the 75mm Summarit (*Update: the newer 75/2.4 Summarit has a minimum focus distance of 0.7 m – hooray!).
And what about build quality?
The two Summarit lenses I own (the 75mm and the 35mm) do not feel quite as substantial in the hand as their Summicron or Summilux brethren. Now, I don’t know how much of that is secondary to the relative paucity of glass required for an f/2.5 optic vs. an f/2 or f/1.4, and how much of that is secondary to a difference in build quality, but that’s the impression. That’s not to say that the Summarits feel cheap – far from it, they are of excellent build quality with precise aperture clicks and very smooth focusing rings. And remember, having a lighter lens that is capable of top-notch optical performance is not such a bad thing. In fact, one could say that it is very much in line with the original Leica philosophy 🙂 .
____________________________


____________________________
The Leica 75mm Summarit (f/2.5) is capable of rendering with impressive sharpness and very pleasing bokeh. It’s perhaps too sharp for some types of portraiture and its bokeh may be marginally less smooth as compared to some of Leica’s finest A major shortcoming is its minimum focus limit of 0.9 m. The only other limitation is its maximum f/2.5 aperture, which is only a problem if you require wider apertures — in which case, you shouldn’t be looking at an f/2.5 lens. In the final analysis, however, the 75mm Summarit is an excellent optic in a small package that, in most applications, simply excels.
—Peter | Prosophos.
____________________________
–
–
I’ve been on a writing blitz the last 48 hrs, working non-stop on my Leica 75mm Summarit report. I’ll be dedicating the rest of today to it too, so it should be ready for posting by tomorrow.
If you’re interested in reading it, please stay tuned.
—Peter.
(please click on the image to view)
↑Leica M9 and Leica 75mm Summarit @ f/2.5.

I’ve been entertaining posting a brief write-up of this little lens, but thought I’d first ask whether there’s any interest out there.
If you think this is something you would want to see, please either comment directly on this post, or email me privately.
Thanks!
—Peter.
I was fortunate enough to have Mike agree to an impromptu street portrait.
One of my favourites from this year.
(please click on the image to view)
↑Leica M9 and Leica 75mm Summarit @ f/2.5.
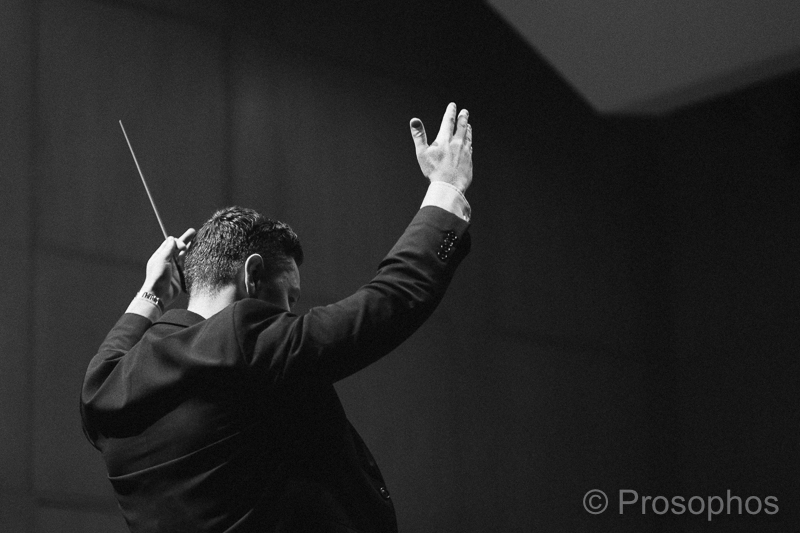
He takes his job very seriously.
(please click on the image to view)

↑Leica M9 and Leica 75mm Summarit @ f/2.5.
He’s been through more heartache than you can imagine.
(please click on the image to view)

↑Leica M9 and Leica 75mm Summarit @ f2.5.
This photo was chosen as a Leica Fotografie International (LFI) Master Shot.
(please click on the image to view)

Leica M9 and Leica 75mm Summarit @ f/2.5.
If you examine my photos, you’ll notice a dominant diagonal line running through many of them. I’ve sort of learned to make images this way automatically, after years of photographing.
Why is a strong diagonal important?
I don’t know the academic answer but I know the simple one: in many cases, photos look better with it than without it.
A strong diagonal connects a photo from the top to the bottom and, in doing so, serves to visually point (much like an arrow) the viewer’s eye from one end to the other and, at the same time, ties the image together. It also serves to “fill” the frame. Finally, it acts as a balance or scale where you can divide the remaining visual elements equally between the two halves on either side of the line. These last two points are, in actuality, addressing and solving problems related to composition.
But enough talk – let’s look at some images.
The 3 images below feature simple structures that form an easily identifiable strong diagonal element:
(please click on any of the images below)

↑Leica M9 and Leica 75mm Summilux @ f/1.4.

↑Leica M9 and Voigtländer Nokton 35mm @ f/1.2.

↑Leica M9 and Leica 28mm Summicron @ f/2.
In this next image the subject is the beach and the strong diagonal is its shoreline:
(please click on the image below)

↑Leica M9 and Zeiss ZM 21mm @ f/2.8.
In each of the above photos, I could have composed differently, but the result would be less pleasing to the eye. How strong is the effect?
Well, take a look at this shot:
(please click on the image below)

↑Leica M9 and Leica 75mm Summarit @ f/2.5.
I had originally taken this photo as a portrait with the subject placed a little off to the side (one of the “rules” of taking portraits is to not centre the person, but that’s another discussion). However, the strong diagonal of the field line kept interfering with my original composition and crop, and the eye kept falling short of the corner of the frame – the look was simply inharmonious. When I cropped the photo so that the white line was allowed to span the image from one corner to the other, the composition became more pleasing, even though I was now violating one of the rules of portraiture.
Such is the strength of the dominant diagonal that our brains are actually willing to give up reality in favour of a more pleasing composition . Here’s an example:
(please click on the image below)

↑Leica MP and Leica 35mm Summicron @ f/4.
We all know that a tower doesn’t jut out of the earth sideways like the CN Tower appears to be doing above, but the photo is made more pleasing to the eye because of it. On a side note, the chosen composition also emphasizes the sheer height of this structure because it somewhat disorients us, and gives us a sense of what it must feel like to stand at the base of the tower.
Here is another example:
(please click on the image below)

↑Leica M9 and Leica 35mm Summarit @ f/2.5.
Once again, the image elements (the buildings) have been tilted so that the window washer platform forms a strong diagonal. The tilting here is also successful because of the sense of vertigo it adds to the image which, by the way, is named Vertigo.
Finally, here is what I would consider a very successful use of a diagonal:
(please click on the image below)

↑Nikon D3 and Nikon 24mm AF-D @ f/2.8.
In the image above, the diagonal is the barrier separating the (Niagara) Falls from the girl. What’s more, this division has resulted in a harmonious composition in that the Falls and the face are equally prominent on either side, and the image is therefore “balanced”. Finally, on an artistic note, the strands of the girl’s hair over her face mirror the linear strands of water behind her, which is immensely pleasing to the eye. I cannot pretend to have planned it this way, but my choice of composition resulted in a happy accident.
I hope the above discussion on strong diagonals was helpful.
I wrote this little piece for my good friend Steve Huff over at SteveHuffPhoto.com, and he was kind enough to publish it. The specific link to it is here.
For the non-photo geek, it’s somewhat unorthodox to use a fully manual camera like the M9 to try and capture action, especially in this world of auto-focus and auto-everything-else. But, as I write below, I’m able to anticipate better with this camera and – what’s more – there is no auto-focus system on the planet that will allow me to track the moving eye of a player at f/2.5 (or wider) better than my own eye. The Leica allows me to be in full control, which is what I want.
Anyway, the article is reproduced here for you:
The Leica M9… for Sports? by Peter | Prosophos
Hi Steve,
Sometimes, when I read the commentary on the various fora, I get the sense that many people view the Leica M series cameras as great for “static” scenes like portraits, landscapes, and bowls of fruit.
Yet, as you have demonstrated with your concert photography, Leicas are great tools for capturing dynamic moments, and I know of at least one person who shoots racecars with his M9!
Despite this, Leicas are not often linked to sports images, so I thought this would make an interesting “just for fun” posting for your fine website.
OK, so the “sports” I’m referring to involves kids, but this still qualifies as action, and it’s not typical of the usual photography most people associate with a Leica camera.
Would I recommend a Leica M as a sports camera?
No, not really. The various “pro” DSLR bodies in existence are weather-sealed, have great high ISO performance, lend themselves more naturally to shooting at telephoto distances, and can be machine-gunned for crazy high frame rates.
Yet, what would I choose to photograph sports (or anything else I shoot)?
Hands down, the M9.
My reasons?
That’s a long story, perhaps long enough for somebody else to write an article about it. For now, I’ll just say that an M camera allows me to shoot the way I want, and to anticipate the action better than any other kind of camera I’ve ever used.
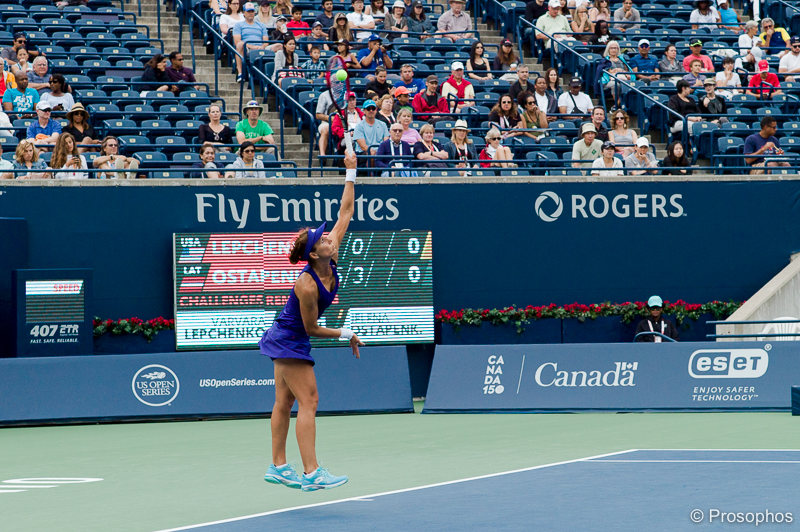
Here are the images, and thanks for doing such a great job with this site!
Peter | Prosophos
(please click on any of the images below)

↑Leica M9 and Leica 75mm Summarit @ f/2.5.

↑Leica M9 and Leica 75mm Summarit @ f/2.5.

↑Leica M9 and Leica 75mm Summarit @ f/2.5.

↑Leica M9 and Leica 75mm Summarit @ f/2.5.

↑Leica M9 and Leica 75mm Summarit @ f/2.5.

↑Leica M9 and Leica 75mm Summarit @ f/2.5.

↑Leica M9 and Leica 75mm Summarit @ f/2.5.

↑Leica M9 and Leica 75mm Summarit @ f/2.5.

↑Leica M9 and Konica Hexanon 60mm @ f/1.2.

↑Leica M9 and Leica 75mm Summarit @ f/2.5.
This last shot was taken with the Nikon D3S, but I’m including it here because I like it:

